- Published on
3 Helpful GitHub Review Tips
- Authors

- Name
- Jacob Toftgaard Rasmussen
Git and GitHub are very powerful tools, and they make the lives of us developers much easier. However, because GitHub has so many features it can also be very overwhelming to use, and you most likely do not know all the ins and outs of the tool yet.
I don’t know about all its features yet, and I use it every day!
While reviewing pull requests on GitHub I have made some small discoveries that really helped me a lot, and I would like to share them with you here.
1. Split Diff (Difference) View
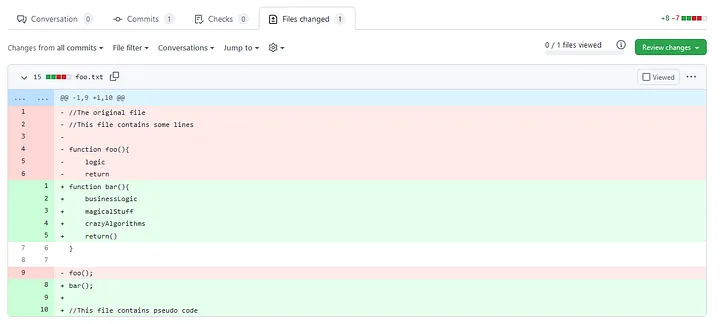
When you review a pull request on GitHub the default setting is set to show the code differences in a single unified file. The existing and new code are squished together with the existing being on top and the proposed changes below as seen in the screenshot below. 
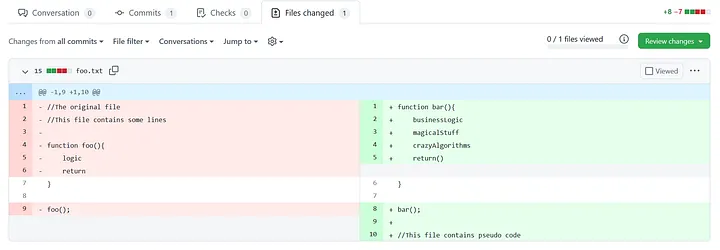
However, many IDEs often display the differences side by side. For some developers, such a view is easier to comprehend. Personally, I really like a split view when I deal with merge conflicts. Luckily, GitHub can also portray the differences in a split view as seen in this next screenshot. 
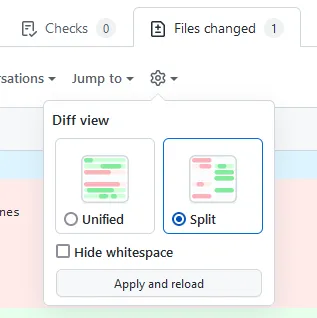
In order to choose between the two different views, you simply click on the small gear icon as shown here: 
2. Display Only the Newest Changes (Changes Since Last Review)
Once the author of a pull request has made adjustments to their code, after someone has reviewed it the first time, it is natural to request a second review.
GitHub kindly points out which files have been changed since you last reviewed them using the yellow outdated tag. This will let you know to take a look at them again.

However, by default, GitHub does not only show the newest changes (the changes introduced since the last time you reviewed). This can make it hard to figure out what has actually changed this time.
If you only want to see the newest changes, you can choose this option through the changes from the dropdown menu.  This can be helpful when there are many differences, and as you see in the screenshot above, if you want to see the changes coming from a specific commit you can also do that.
Additionally, if a new commit is pushed to a branch, which is currently being reviewed, GitHub will detect this and show a small refresh button just below the Files changed tab. Clicking on this button will update the view with the changes from the newest commit. 
3. Suggest Changes
A nice feature, which is unknown to a lot of people, is the option to suggest changes in the code when commenting on a pull request.
If you hover your mouse over a line while reviewing a Pull request on GitHub, a small blue square with a white plus appears at the beginning of the line. Clicking this allows you to make comments to that line. You can also hold down the mouse button and drag down to select multiple lines. In the following screenshot, I have dragged down to select lines 2 and 3.
 This makes the comment window appear where you can add your comment.
But you can also give a code suggestion which the author can then implement with a single click (as you will see later).
To insert a suggestion, you click on the small file icon, as shown below:  This will automatically insert the necessary template code for suggestions.
You write the code as you want it between the suggestion tag and the last three ``` ticks. Then you can click on the Start a review button or Add single comment button.
When finishing your review, choose Request changes, as shown below:  This way, the author will be informed that there are requested changes.
When the author looks at the comment (with your proposed change) they will be able to click on the Commit suggestion button and then the code will be changed. No need to make a new commit and push.  This can be a time saver if there is something that you are sure that you will both agree upon and if it is a small thing to change.
I hope you found these three tips useful. I know that I do, and I use them every day.
If you have any questions or comments, please feel free to reach out to me. I would love to hear your opinion!